Last week :(

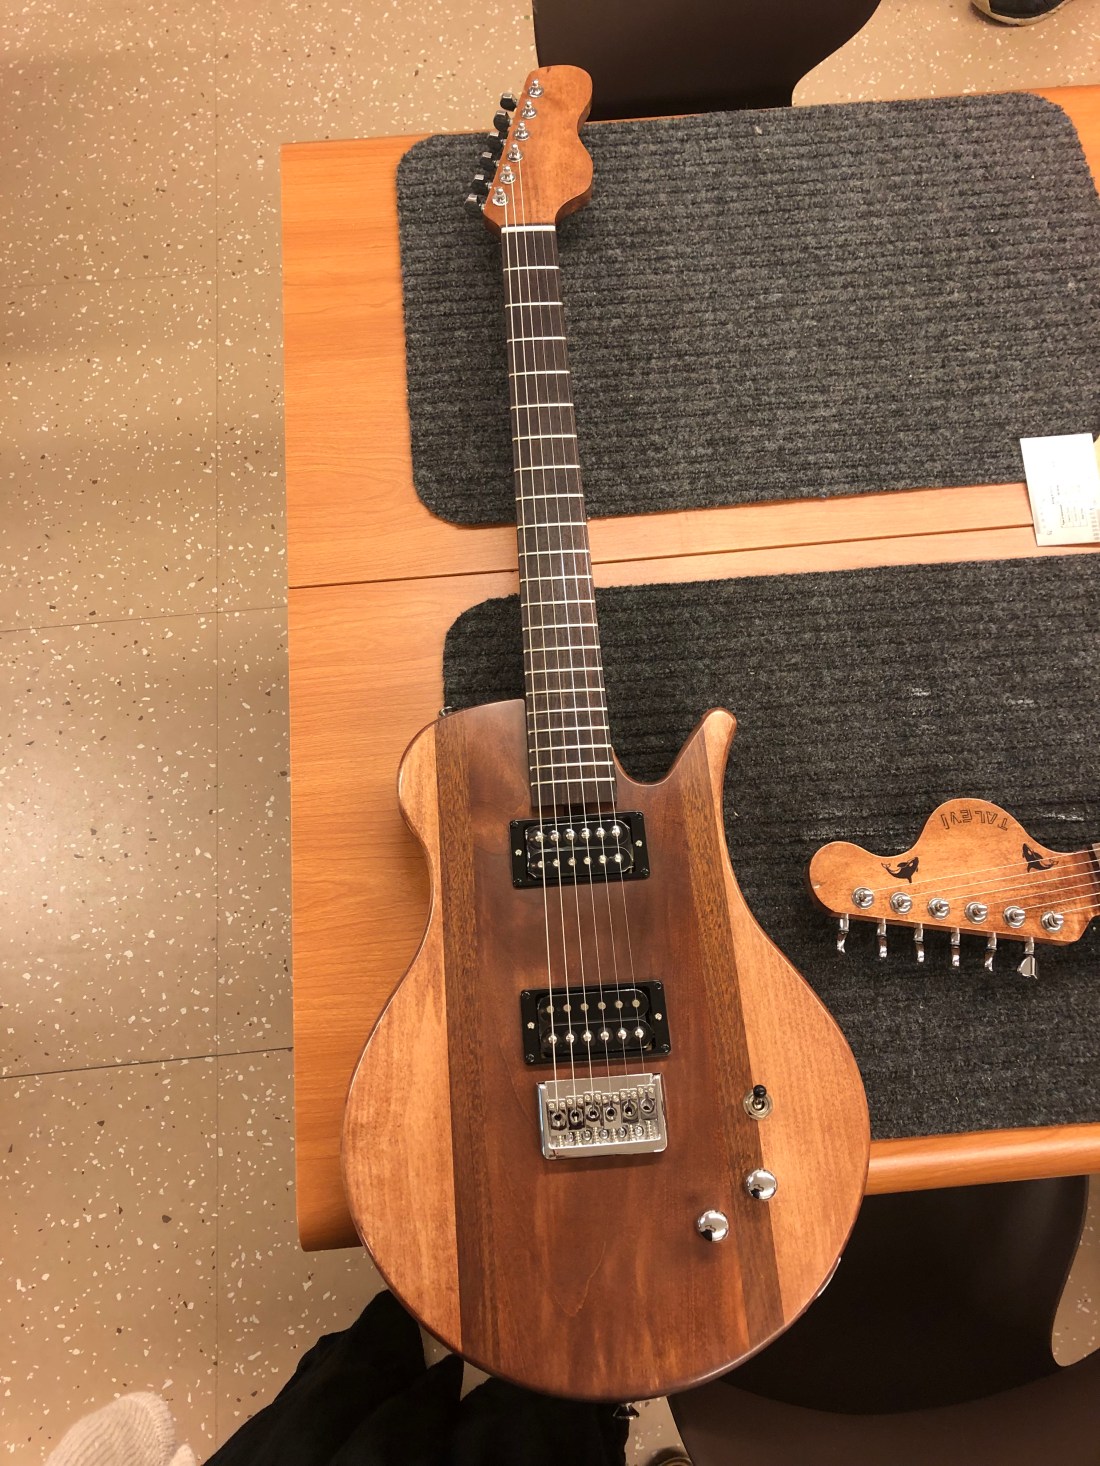
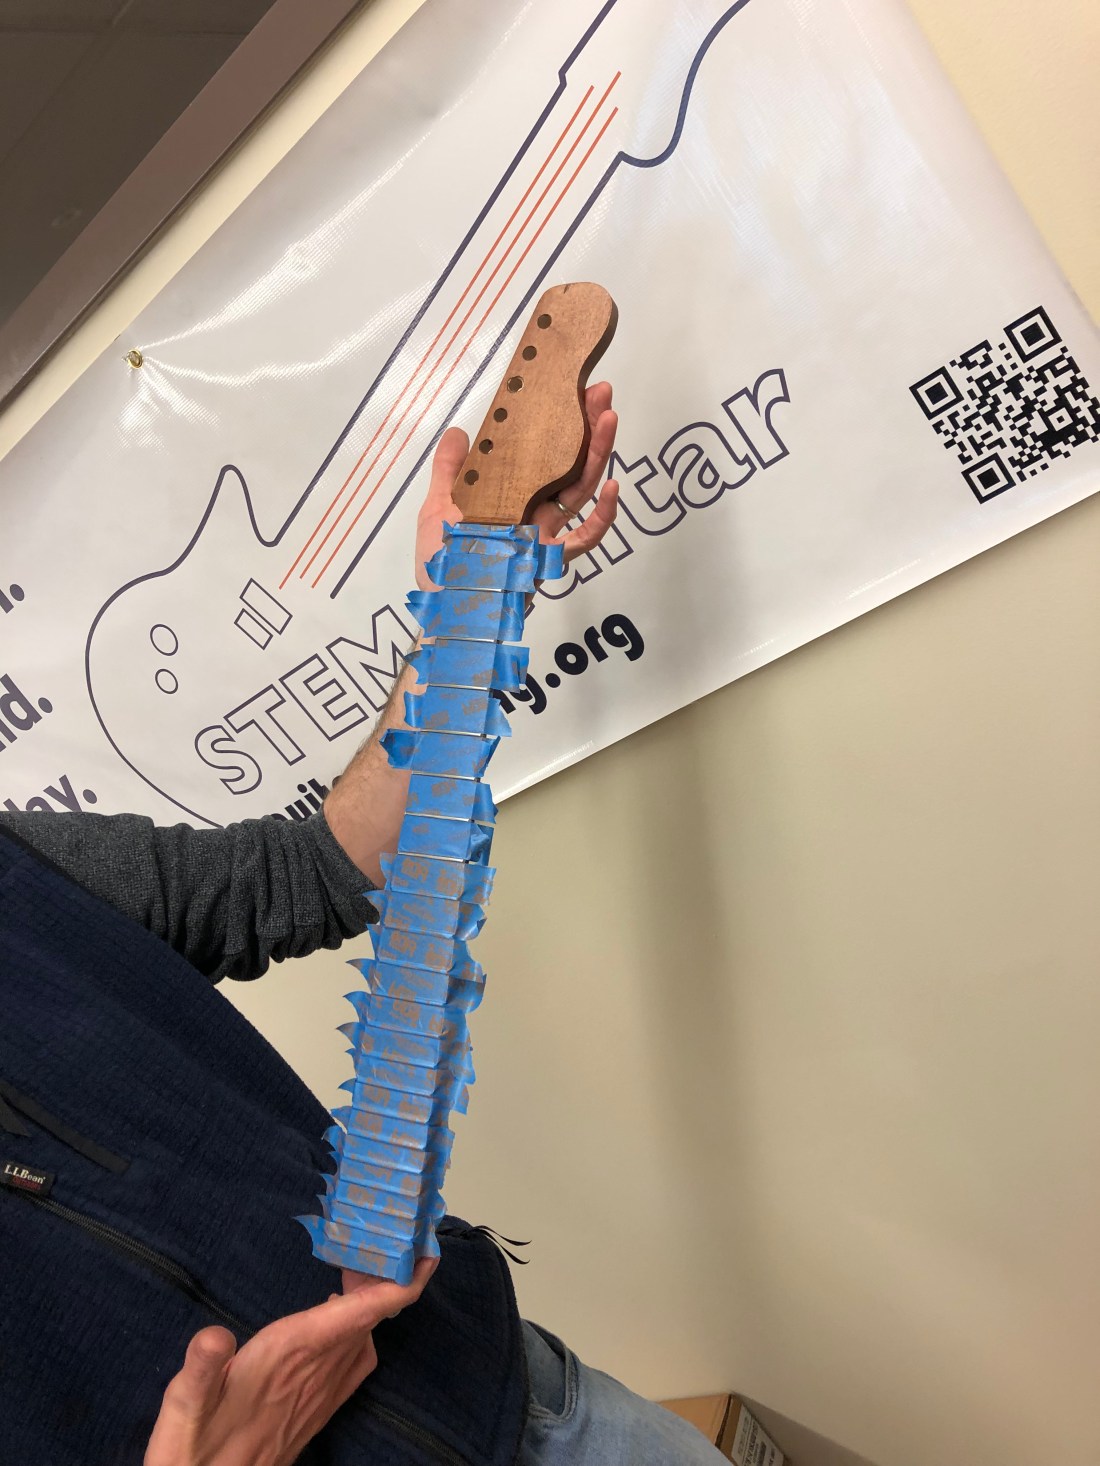
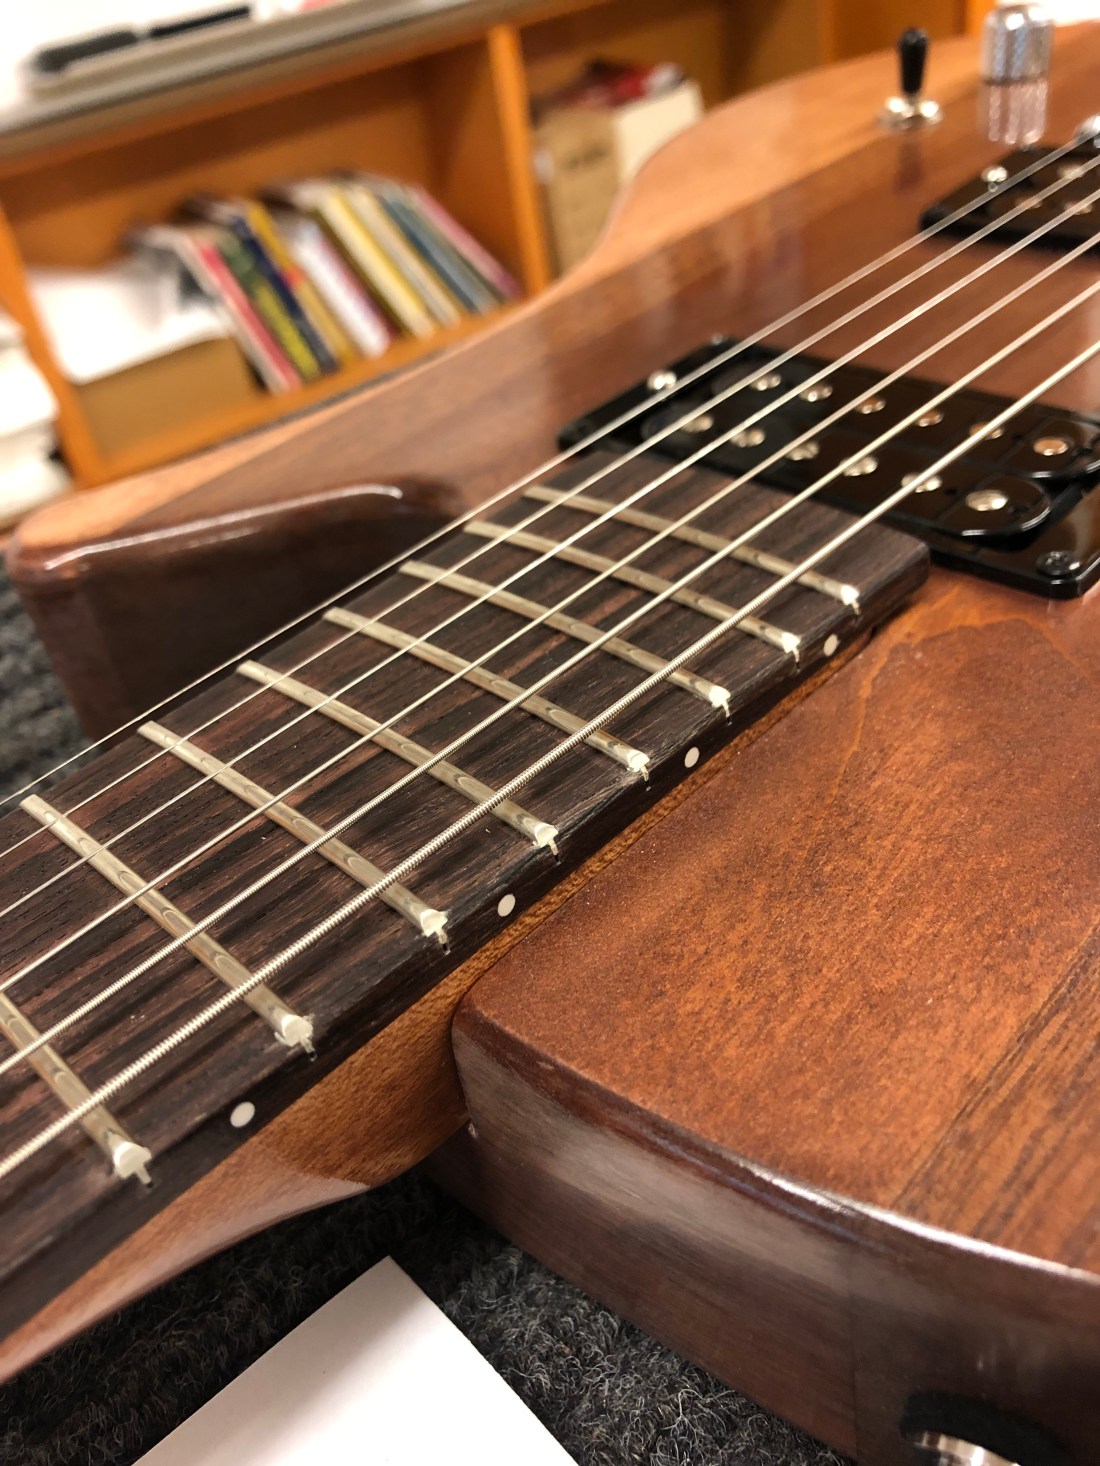
Final setup: For the final set up we put the strings through the string ferrules and the bridge. Then, with mr. McCormack’s help, I tighten each string to the tuning knobs. Then we adjusted the saddles to the correct heights in preparation for perfect intonation. We wanted the high E at 25.5 and adjusted everything else based off that. We then put string nuts on to increase the tension of the guitar on the strings. It was pretty difficult and my first screw broke but we got it eventually. Then I cut the string but down more so all the strings went down to the correct height and were in the string but instead of on top. Then we checked my intonation and had to adjust my saddles so the #12 fret = 1 octave above open string. Then we tuned my guitar and made sure it was correct through the whole scale. After that we checked for fret buzz. Then we were all set.

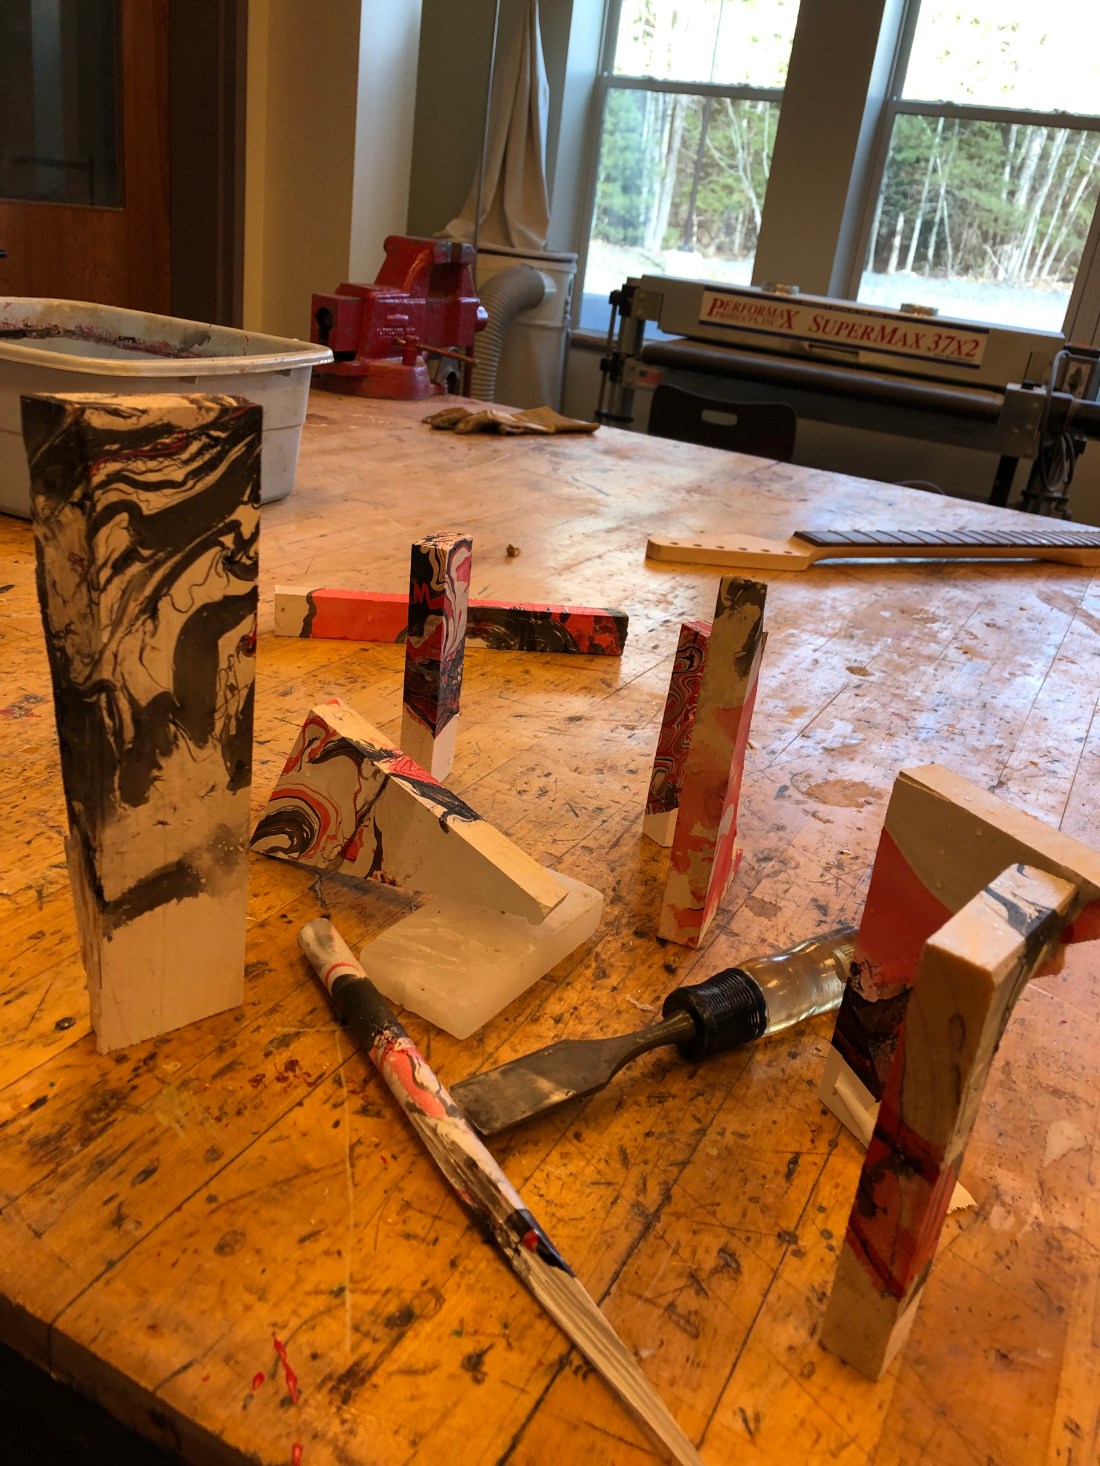
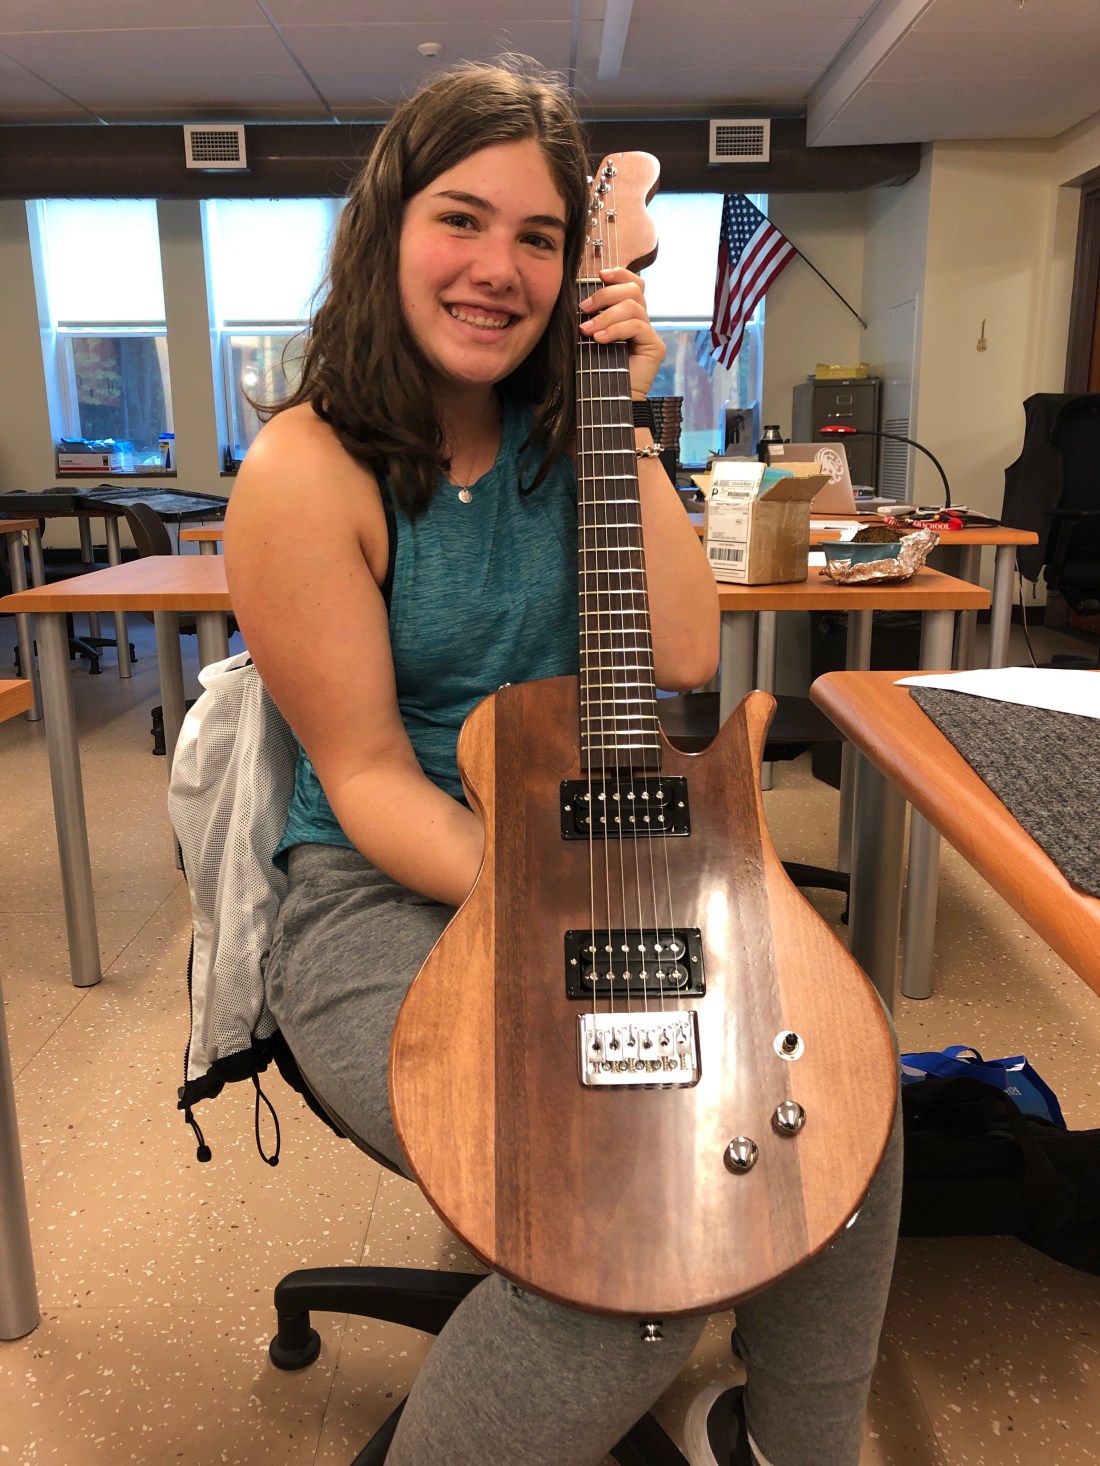
One academic lesson: A lesson that meant the most to me was the project guitar. We spent a lot of time prepping the swirl dip with Liv and choosing the design to go on the headstock. It really was nice to see everyone working together for one common goal. It was also really cool to see everyone do their own swirl dip guitar and get to keep it. Then eventually keep the little guitars as a memory. It really meant a lot to see everything all come together, although we didn’t finish the guitar, it still was fun to be able to do everything together.

Overall reaction: Oh my goodness this was my favorite class to do. Everyone was able to help each other with their guitars. It truly made everything so much like a community and that was awesome. I became friends with people who I haven’t before and got to bond with people I have. This was an amazing class and I hope that you do this till you retire in thirty years because I want my brother to go through this and I hope that maybe my sister but that pushes it a bit haha. Thank you for this class, I appreciate all the help and support you gave me.

Week Twenty Three

Accomplishments: This week I was able to finally string up my guitar and put on the running knobs. I also put in the hardware, pick ups, and cover plate. I also attached my neck to my body.

Tools: This week I used a soldering iron to connect my toning and volume knobs. I used many screws to attach my neck, and cover plate. I also used the drill to drill them in.

New learning: I learned that the bridge saddles need to be of different heights and that the strings in general were different thickness.

Week Twenty Two

Accomplishments: This week I sanded and polished my neck. I also took off my carabiner hooks and what we used to attach them.

Tools used: I used 3000 grit sand paper and water to sand down the neck. I then used the polish and two cloths to polish and then dry off the polish.

New learning: I learned that you need Mr. McCormack grade strength to polish my guitar.

Week Twenty One

Accomplishments: This week I was here for only the last day so I wasn’t able to do much. However I did start sanding down my body after it was sprayed.

Tools: The tools I used was a cup of water, 1000 grit sandpaper, a piece of a fingerboard and some tee shirt to wipe away the excess.

New learning: I learned that with basically everything here it needs to look dull before it looks shiny.

Week Nineteen

Accomplishments: This week I was able to put several coats onto my body and neck.

Tools: We used the spray gun, a air pressure thing and hooks and a lift to make spraying easier.

New learning: This week I learned how to use a spray gun and I got more comfortable with it over the week.

Week Eighteen

Accomplishments: This week I was able to help the class swirl dip the auction guitar. I also sprayed clear coat on my neck and polished the frets on the auction guitar.

Tools: This week I used acrylic paint to swirl dip the guitar. Spray gun to shoot on the clear coat. And steel wool to polish the frets.

New learning: This week I learned that if you have the nozzle with the two prongs on the top and bottom, you spray horizontally and if you have the two prongs on the left and right sides you spray vertically. I also learned that you have to spray the clear coat so that it’s wet but not dripping or else you will have runs that are hard to get out.

Week Seventeen

Accomplishments: This week I was able to tape my headstock finger board to prepare it for the clear coat spray. I also helped dan tape his finger board too. Liv Lauren and I also filled a trash can with water and did the logos for the auction guitar.

Tools: We used the good tape for each individual fret and space then the cheap tape for the tops. We used two trash bags for the trash can to put the water in.

New learning: I learned that you need to use two trash bags and let the air out when you fill it so it suctions to the sides.

Week Sixteen

Accomplishments: This week I completed some test trials with swirl dip with Liv. We also created the headstock logo for the auction guitar.

Tools: We used google docs to make the headstock logo and acrylic paint for the swirl dip.

New learning: This week I learned how to swirl dip and I also learned how to get images mirrored and set up for the headstock logo.

Week Fifteen

Accomplishments: This week I was able to finish sealing my neck and body. After that I sanded down the rough pieces to make it all the way smooth.

Tools: We used sanding sealer on the neck and body. Then used 300 grit paper to sand down any rough spots.

New learning: This week we learned how to apply the logo designs to the headstock. It is printed on a special paper and then when you submerge it into water it works kinda like a temporary tattoo and you peel the backing off and press the design in.

Week Fourteen

Accomplishments: This week I was able to stain my neck and we also learned about the circuit diagram of the guitar wiring that we did. I had to go over some spots that I covered with tape with some more stain but it came out okay. I used sanding sealer on the body and cover plate as well.

Tools: We used a diagram of the picture of the electrical work and then we used a separate sheet to spread everything out. I also used gloves and stain to seal up all white spots and I also used sanding sealer to seal my stain in.

New learning: I learned that the electronics can be written out in many ways and how exactly to do that and be able to recognize what I had already constructed in a different way. I also learned that there was more than one was to show a wiring diagram.